You want to plan your hike in Torre del Paine National Park and don’t know where to start? Should I hike the W- or O-trek? What are the differences between these two treks? Do I have to organize something beforehand? When should I start planning? How much does it cost? We will answer your questions and give you great tips for a successful and unforgettable hike in Torres del Paine National Park – one of the most beautiful parks in the world.
1) Plan ahead and prepare.
This is in our opinion the most important aspect about your hike in Torres del Paine. So, how long in advance should you organize your trip? We booked the accommodations 4 ½ months in advance. Yet, one campsite was already booked out. Therefore, we would recommend booking the campsites as soon as you decided to go there.
We met people who did not plan it far in advance. Some still managed to do the hike, but had to pay a lot of money, because only pre-setup tents were available. Others were unable to do the hike, because there weren’t any campsites available or they didn’t want to spend as much money on pre-setup tents or rooms in shared dorms. It would be a pity however, if you travel all the way to Patagonia and are unable to do the trek you were really looking forward to.
If you’re already in Puerto Natales and figure out that you cannot do the multiple day hike in Torres del Paine, because the campsites are booked-out, don’t get too frustrated. There are only limited accommodations, pre-setup tents and camping spots available in the park. However, this is a good thing. The rangers aim to protect the flora and fauna by limiting entrance to the park for hikers. Without these restrictions, hikers and day-tourists would overrun this park. In addition, the park has clear rules, and it is important to follow them. For example, wild camping is prohibited and cooking is only allowed in certain areas. This is for a reason. Earlier, parts of the park burned down, because people, cooked in protected areas or burned toilet paper alongside the tracks. These might have been accidents, but it resulted in the destruction of hundreds of hectares in this beautiful park.
2) Dilemma: should I go for the W- or the O-trek?
To decide which trek to hike, you need to know the differences between the W- and the O-trek.
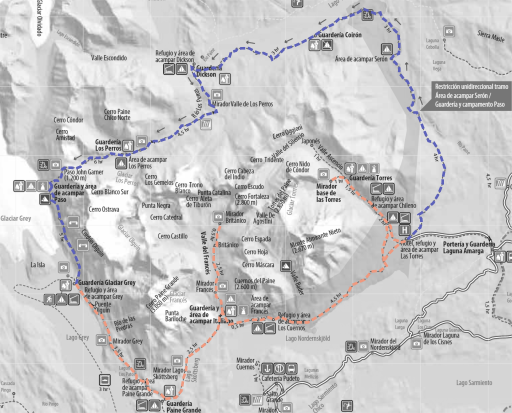
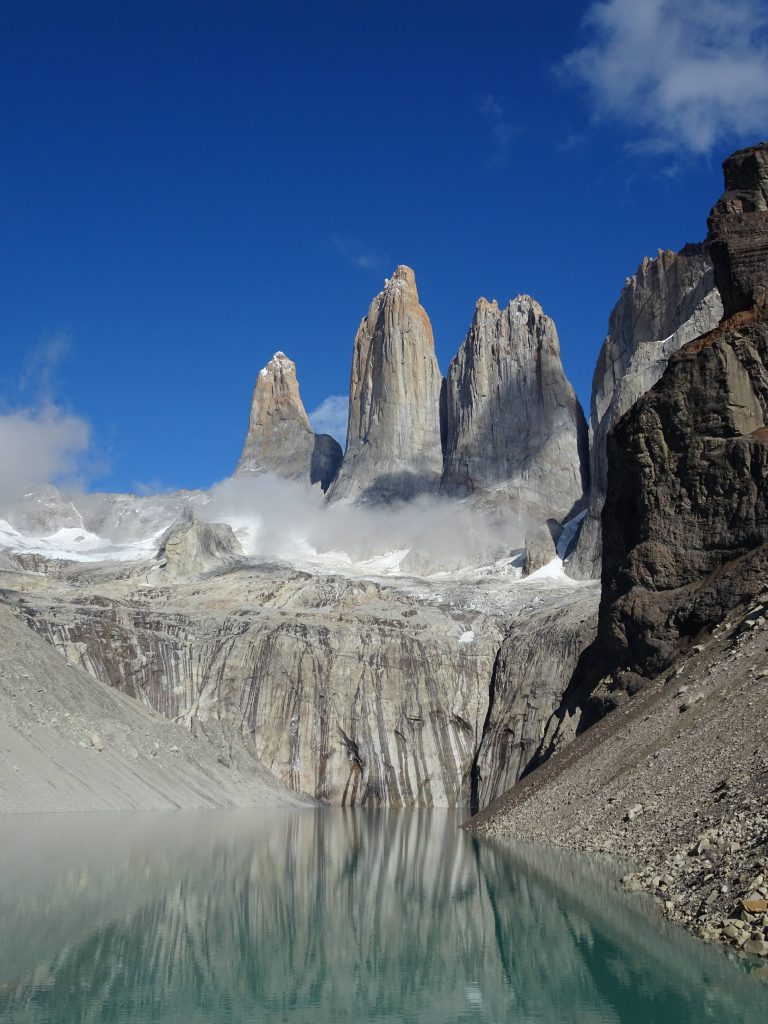
As you can see in the map, the W-trek forms a W and takes circa 3-5 days, while the O-trek forms an O and takes around 7-9 days. The O-trek includes the W-route.
Which trek you want to choose depends on you:
- Do you have hiking experience?
- Are you fit?
- Do you like hiking?
The last question might sound silly, but we met people who realized that they don’t like to hike for multiple days. In that case, one-day trips might be a more suitable option.
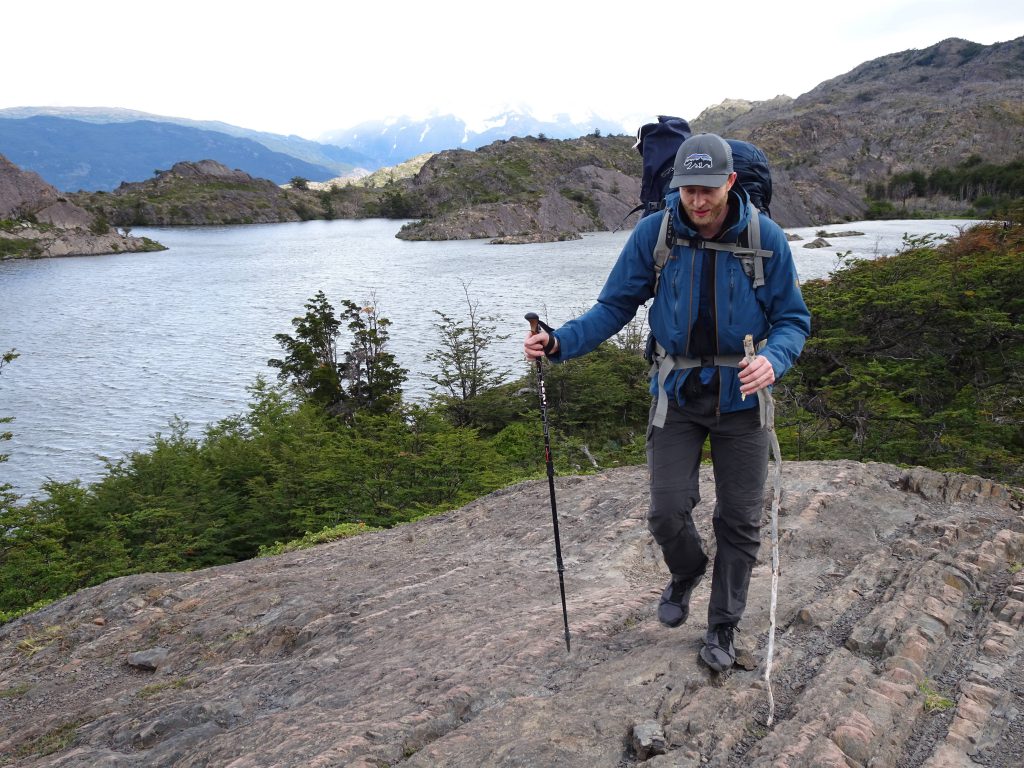
We decided to do the W-trek. We both had a good standard fitness, but did not train for this hike. Also, we never hiked with such a heavy backpack. Therefore, we thought that we should try a shorter trek first to experience hiking with heavy backpacks. Also, we thought that we should start our journey in a relax fashion, because we should not injure ourselves at the start of our journey .
If you are fit, you do not necessarily have to train for the W-trek. Obviously, it would be useful to train with a 10-kilogram backpack. This way, you can properly tune your backpack and train your back, knees and feet. However, we did not have the time. In the W-trek, there are parts that are easy, because they are flat with a smooth road. Even so, others are steep, where you practically have to climb over stones or walk in small streams.

We were happy that we chose the shorter hike. Janice fell and injured her knee, and had knee-pain for four hiking-days. Ralph felt his feet at the end.
Nevertheless, it was all worth it!
3) When to hike in the Torres del Paine National Park?
Generally, the weather conditions are ideal during summer from November to March (summertime in the southern hemisphere). However, summer is also peak season. Therefore, it is (more) crowded on the trek and you should book your campsites on time. We started our hike in the beginning of March and were told that the numbers of hikers was decreasing, but that in a few weeks you could really notice this (e.g. camping spots, rental gear). During our trek, the weather conditions were good. We had some sun, some rain and some strong winds. It also froze during a couple of nights, but we were never cold. Typically, halfway into March the temperatures are going to drop. It should be noted, that the weather is very unpredictable; therefore you should always have gear for “four seasons”.
It is also possible to hike in April (check the websites of the campsite to see when they close). Nowadays, winter hikes are getting more popular, but prepare well, as snow/ice can cover the trails.
4) How expensive is the W-trek?
The prices depend on many factors:
- How many days do you want to hike in Torres del Paine?
- Do you want to overnight in your own tent, a pre-setup tent, a dorm or a private room?
- Will you carry your own food or will you buy food at the refugio’s?
- Do you bring your own gear (tent, sleeping bag, etc.), or will you rent it?
Costs we made in Torres del Paine
| Purpose | Costs in euro p.p. |
|---|---|
| Entry fee for 5 days | 38 |
| Bus tickets (both ways) | 19 |
| Boat to get over the lake | 21.5 |
| Accomodations | 55 |
| Camping equipment | 63 |
| Food | 35 |
In total we spent 231.50 euros per person for the W-trek (5 days).
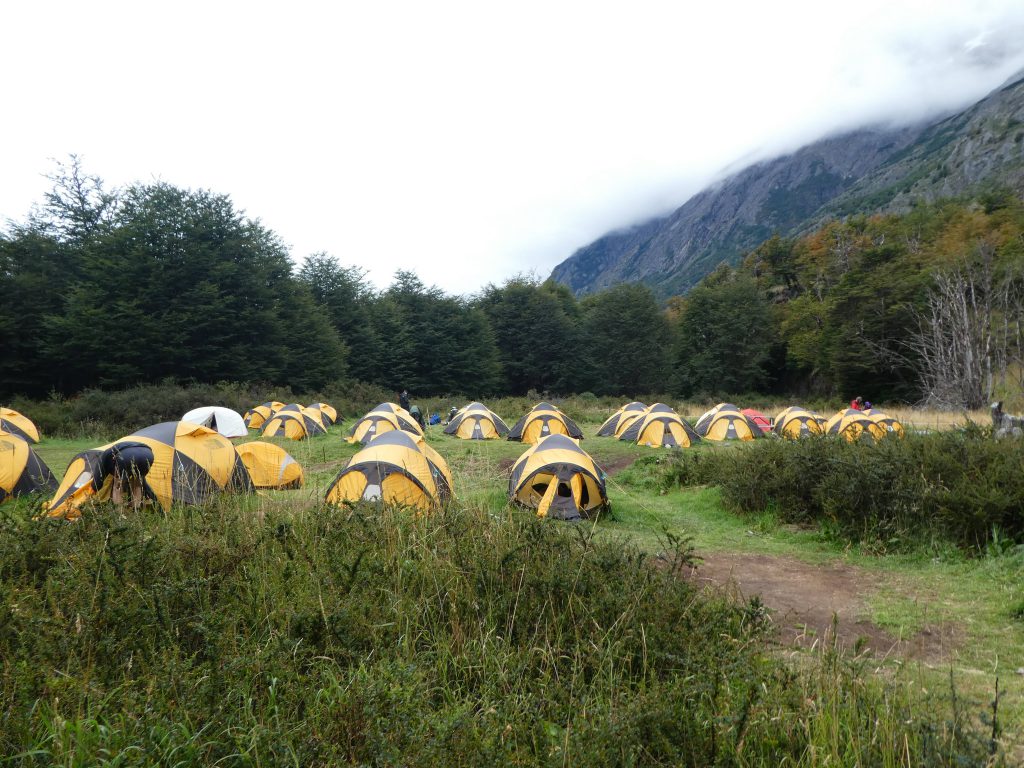
We stayed at campsites and carried our own food and camping equipment. This saved us quite a lot of money. The prices for pre-setup tents and dorms are very high. While we spend in total 231.50 Euros, we were told others payed 800 euros per person for the whole trip. However, they slept in a shared hut and got meals, so they did not have to carry their tent and food. Two other girls we met booked their hike a week in advance. Their only option was to overnight in pre-setup tents. Therefore, they had to pay 65 euros per night per person for a tent, including sleeping bag.
Conclusion: By booking in advance, you can save a lot of money (but not your back)!
5) How to book accommodations for the W-trek in advance?
After deciding which trek you want to do and when you want to go, you can book the accommodations. There are three different operators, which offer campsites and rooms in the park – CONAF, Vertice and Fantastico Sur.
While Fantastico Sur has their campsites and refugios mostly at the east side, you find Vertice and CONAF on the west side of the park. They do not have a joined booking system. Therefore, you have to book the desired accommodation on separate websites.
CONAF: www.conaf.cl
Vertice: www.verticepatagonia.cl
Fantastico Sur: www.fantasticosur.com
Before booking the accommodation, you should consider how many days you want to stay in the park and how many hours you want to hike per day. The table below shows you the average time it takes to walk from one to the other campsite on the W-trek, without food or picture breaks. We included only the campsites we stayed at during our trip. You can also find these estimates on the maps of the park.
Hiking distances per day in Torres del Paine
| Day | From-To | Km | Hours* |
|---|---|---|---|
| 1 | Paine Grande camping site – Grey camping zone | 11 | 3.5 |
| 2 | Grey lodge – second hanging bridge lookout – Paine Grande camping site | 18 | 7.5 |
| 3 | Paine Grande camping site – Británico Lookout – Francés camping zone | 20.3 | 9 |
| 4 | Camping Francés – Las Torres camping zone | 16.6 | 6.5 |
| 5 | Las Torres camping zone – Las Torres Lookout – Las Torres camping site | 18.8 | 9 |
* This is an indication. In general, we completed the day-routes about 1-2 hours faster than the indicated time. However, we also met people who needed more time. Next to your speed, it also depends on the number of food and picture breaks you take.
Our itinerary
Altogether, we spend five days in the park. For the night, we booked the following accommodations:
- 1st night: Guardería Glaciar Grey
- 2nd night: Guardería Paine Grande
- 3rd night: Área de acampar Francés
- 4th night: Área de acampar Las Torres
This itinerary suited us like a glove. Initially, we booked the ‘Guarderia y área de acampar italiano’, which is a free campsite. However, as we were pretty tired after the second day, we instead decided to stay one night at the ‘Guarderia y área de acampar Paine Grande’. Therefore, we had to cover a greater distance the next day, but it was a good decision. At Paine Grande, the bathrooms were very good. By contrast, we heard that the bathrooms of the Italian campsite were pretty dirty. However, because we haven’t stayed there, we cannot say whether it is true or not.
Initially we wanted to stay at ‘Refugio y área de acampar Chileno’. This campsite is situated very close to ‘Las Torres’. Therefore, it is an ideal place to hike in the morning to see the sunset at ‘Las Torres’. Unfortunately, the campsite was booked out and the rooms that were available were very expensive. Therefore, we stayed at ‘Área de acampar Las Torres’. If you want to see ‘Las Torres’ at sunrise, we would highly recommend to book the ‘Chileno campsite’ instead.
6) What should I do if there is no accommodation available?
If you are unable to reserve a campsite or if the other options are too expensive, you still have opportunities to visit the park.
The following trips are possible for a day or two-day hike in Torres del Paine National Park:
1) Plan a one-day trip from the ‘Paine Grande campsite’ to ‘Glacier Grey’.
The hike is 22 km and takes around 7 hours.
2) Organize a one-day trip from ‘Las Torres Welcome Center’ to ‘Las Torres’.
The hike is 18.8 km and takes around 9 hours.
3) Plan a two-day hike and book one night at the ‘Paine Grande campsite’
– the biggest one -, which mostly likely has vacancies. The first day you can hike to the ‘Francés or Britanica Lookout’ and back to the ‘Paine Grande campsite’ (20 km, 7 hours, or 25.8, 11 hours, respectively). The second day you can hike from the ‘Paine Grande campsite’ to the ‘glacier grey’ and back (22 km, 7 hours). From Paine Grande you can take the boat back to Pudeto on the same day or stay one night longer at the campsite.
When doing a day-trip, the only disadvantage is that you also have to pay the permit to enter the park for three days. If you want to see the glaciers, you either have to take the boat, which is quite expensive, or hike very long. At ‘las Torres’ the trail gets considerably more busy as soon as the busses with the day-hikers arrive.
7) How to book a bus ticket to the National Park?
You can either book a bus ticket directly at the bus station or online. We booked our tickets online with Bus Sur to ensure to get the earliest bus. When booking tickets online with Bus Sur, you cannot pay with a credit card. This is just for Chilean credit cards. Instead, you can pay with PayPal.
There are various bus-stops in the National Park, which was confusing at the beginning. The bus stops at all bus stations. The first stop is at an administration point where you can buy your permit. Because we wanted to hike the trek from west to east, we booked our bus ticket to Pudeto. The boat also departs from there. However, the boat ticket isn’t included in the entrance fee; you have to buy it on the boat. We would highly recommend booking an early bus, so that you can start to hike on time. Our bus departed at 6.40 and arrived at 9.00 at Pudeto. We aimed at getting the 9 o’clock ferry. Unfortunately, we missed the boat connection, because many people arrived there before us by car. Therefore, we had to wait for two hours for the next boat.
If you want to hike from east to west, you should book the ticket to Laguna Amarga. From there goes another bus to the welcome center.
8) Where can I stay before the trek?
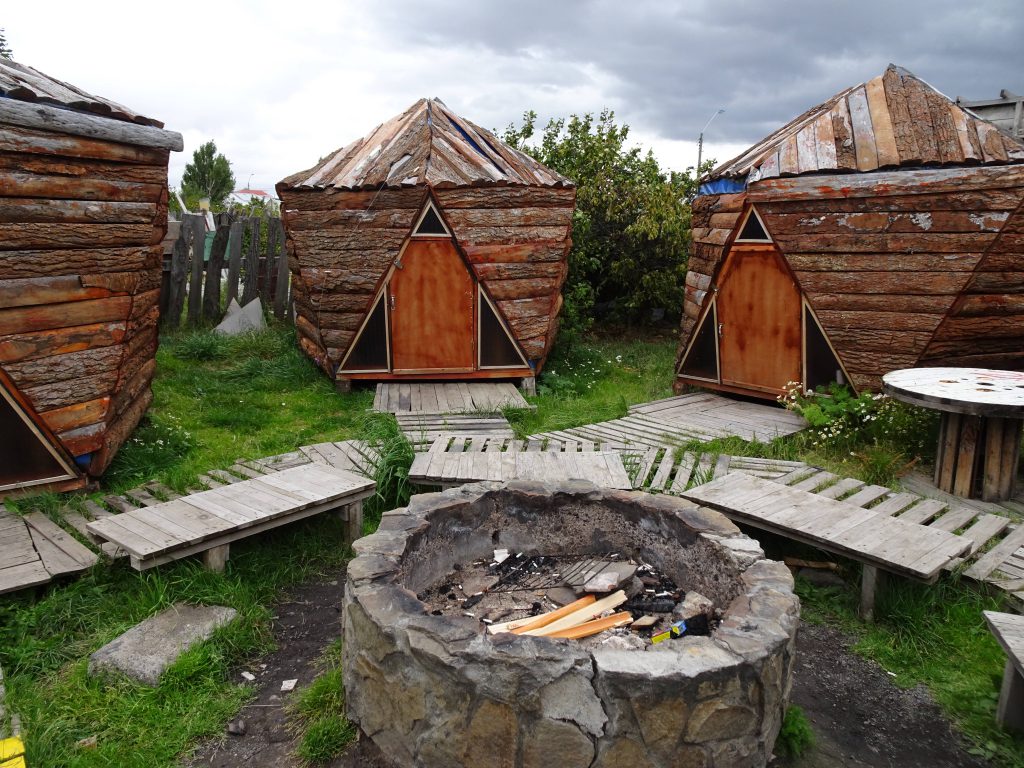
Puerto Natales is the gateway to Torres del Paine National Park. If you look for an affordable and nice accommodation, we can recommend Refugio Hoshken. We stayed in a little hut, which was really cozy. The bus takes 2 to 3 hours from Puerto Natales to the national park.
9) Do I have to bring my own camping equipment?
Bringing your own camping equipment to Chile is not necessary, because there are many different companies that rent camping gear. However, if you primarily visit Patagonia to hike, we would recommend bringing your own gear. This way, you know exactly what quality gear you bring. Also, it isn’t cheap to rent gear for several days. In our case, it was the best decision to rent the camping equipment, because we were not planning to do many multi-day hikes during our travels.
We arrived in Puerto Natales on a Saturday to make sure that the rental shops were still open. Luckily, grocery stores and many rental shops are open on Sundays. Thus, we had two stress-free days to prepare everything for our trip.
10) Where can I rent camping gear, and what do I need?
There are many different rental places that rent camping equipment (e.g. Rental Natales, Erratic Rock, Puma House and many other hostels). We rented our gear at Rental Natales and were very happy with their service and gear. The employer gave us good advice about the weather and equipment. For example, Ralph got an extra-long sleeping bag and Janice an extra warm one, because women are generally colder during the night. In addition, the quality of the gear was very good (well-known brands). For instance, at some shops, the quality of the hiking poles were very bad, the sleeping bags very bulky and at one shop they even rented broken gear (see box below). Therefore, it is very important to compare prices and the quality of the equipment, but also to follow your intuition.
The story of the broken stove
To get an overview of the prices and the quality of the gear we were collecting information at various shops. At one place, a hiker returned his stove and said it was broken. He said that after several minutes of cooking, flames erupted from the hose connecting the stove to the gas tank. This particular shop did not have all the gear that we needed for the day we planned to depart, therefore we did not rent our gear here.
During the first day of our hike, we met a couple from the US and dined together. They were heating their water and after several minutes: whoeessshhhh flames erupted from their hose!! Everybody was startled, but luckily nobody got hurt. We asked them where they rented their gear….yes, indeed, that one shop (if you want to know which shop, please contact us via e-mail)! Lesson: properly check all your gear before you go to Torres del Paine! The coming days we, and a few others, offered our stove so that they could cook!
We rented the following camping gear:
- Two persons tent (1x)
- Sleeping bags (2x)
- Mattress (2x)
- Stove (1x)
- Pot (1x)
- Gas canister (1x) (You actually buy the gas. We bought a big one, but a small one would’ve been sufficient for five days)
- Trekking poles (1x, we shared them)
We brought our own backpack, cups and cutlery, therefore we didn’t have to hire it. We also didn’t take bowls, because you can eat from the pot. This saves weight as well as time while doing dishes.
Do you need trekking poles? Yes? No? Yes? No?
We were unsure whether we would need trekking poles. We asked many people, which said we should take them or share one pair. Now we can definitely say ‘YES, you should take trekking poles to the Torres del Paine National Park!’ Before, we never walked with them and thought that we also don’t really need them. However, trekking poles improve the quality of your hiking-life a lot. Using them especially reduces the strain on your knees. In addition, they help you stabilize when crossing rivers, on rocky roads, during strong winds or walking up and down the hill. Sharing one stick was already awesome, imagine using two! Next time, we would definitely take a pair per person.
11) General tips
- It is possible to buy the national park entry ticket beforehand in Puerto Natales. It saves some time for the entire bus at the administration office. If everyone bought the ticket beforehand, chances are bigger that you don’t miss the boat at Pudeto and have to wait two hours or the next one.
- Ask your hostel if they can store your bags. This was possible and free of charge at our accommodation.
- Meet other hikers and get inspiration from travelers in the ‘Base Camp bar’ in Puerto Natales. They also have food and music. It’s a great place to get to know other hikers and make new friends.
- If you’re asking yourself what to pack for a multiple day hike in Torres del Paine National Park? Read our article ‘Torres del Paine: How to pack for the W-trek’.
- Bring cash, because you have to pay cash for the boat and the permit (and beer).
- The routes are marked very well, so you don’t need a guide.
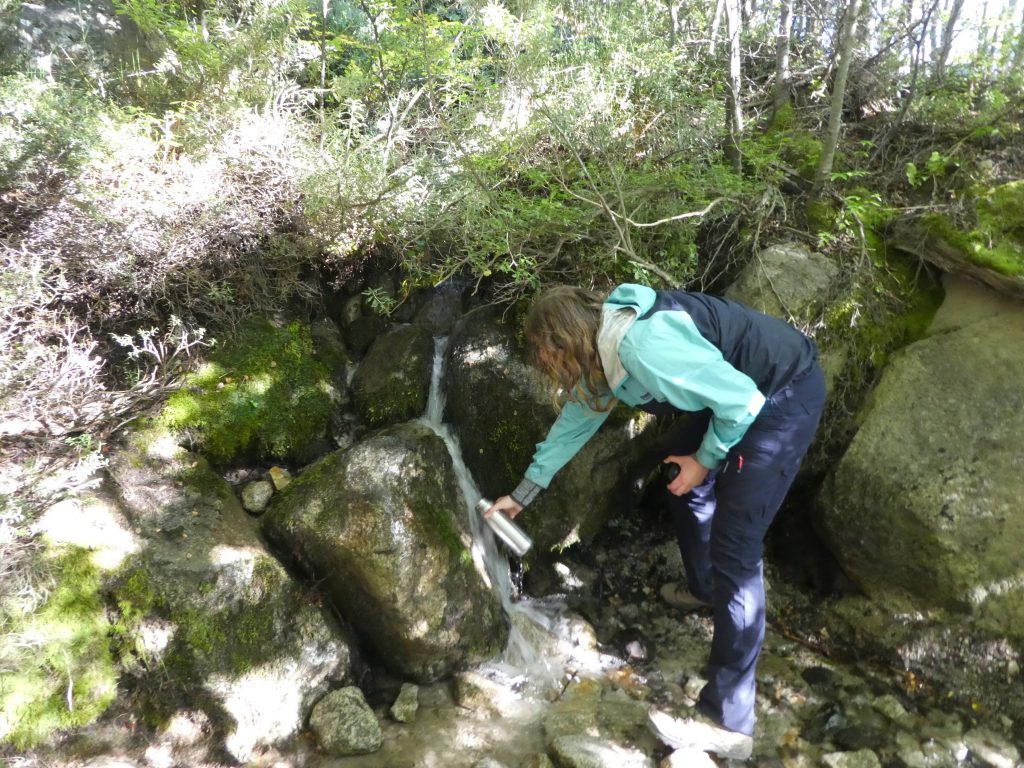
- Only bring a water bottle of 1-2 liters. The water from the streams in the National Park is drinkable.
Now, you should be prepared to plan your own hike in the Torres del Paine National Park!
Let us know in the comments if you have questions about the planning of your hike or if you have some tips we didn’t mention yet.